初步认识SpringBoot
SpringBoot是Spring框架的一个快速启动的脚手架,使用SpringBoot,我们将省去Spring框架那些繁琐的配置,从而将我们的大脑和双手从配置工作中解放出来。使用SpringBoot,我们可以快速地搭建起一个基于Spring框架的Web项目。
创建项目,引入依赖
1
2
3
4
5
6
7
8
9
10
11
12
13
14
15
16
17
18
19
20
21
22
23
24
25
26
27
28
29
30
31
32
33
34
35
36
37
38
39
40
41
42
43
44
45
46
| <!--所有SpringBoot项目,都必须以spring-boot-starter-parent为父项目,也就是说,所有的SpringBoot项目,都是该项目的子项目。-->
<parent>
<groupId>org.springframework.boot</groupId>
<artifactId>spring-boot-starter-parent</artifactId>
<version>2.0.4.RELEASE</version>
</parent>
<dependencies>
<!--web功能的启动器,里面是和SpringMVC等web层相关的依赖-->
<dependency>
<groupId>org.springframework.boot</groupId>
<artifactId>spring-boot-starter-web</artifactId>
</dependency>
<!--测试功能的启动器,用于整合junit测试功能-->
<dependency>
<groupId>org.springframework.boot</groupId>
<artifactId>spring-boot-starter-test</artifactId>
<scope>test</scope>
</dependency>
<!--lombox插件的依赖,SpringBoot内置,无须标注版本号-->
<dependency>
<groupId>org.projectlombok</groupId>
<artifactId>lombok</artifactId>
</dependency>
<!--MySQL数据库驱动-->
<dependency>
<groupId>mysql</groupId>
<artifactId>mysql-connector-java</artifactId>
</dependency>
<!--通用mapper,基于MyBatis的一个通用Mapper,里面依赖了MyBatis-->
<dependency>
<groupId>tk.mybatis</groupId>
<artifactId>mapper-spring-boot-starter</artifactId>
<version>2.0.3</version>
</dependency>
</dependencies>
<build>
<!--SpringBoot插件-->
<plugins>
<plugin>
<groupId>org.springframework.boot</groupId>
<artifactId>spring-boot-maven-plugin</artifactId>
</plugin>
</plugins>
</build>
|
application.yml配置文件
SpringBoot只是简化项目的配置文件,并不是真正没有了配置,最起码比如数据库连接信息,就需要我们自己手动配置。
我们在resources目录下创建一个application.yml的配置文件。
1
2
3
4
5
6
7
8
9
10
11
12
| spring:
datasource:
driver-class-name: com.mysql.jdbc.Driver
url: jdbc:mysql://localhost:3306/myshop
username: root
password: admin
jackson:
default-property-inclusion: ALWAYS
time-zone: GMT+8
date-format: yyyy-MM-dd
mybatis:
type-aliases-package: com.hrp.domain
|
以上就是我们的所有配置,相比较于SSM框架中的配置,SpringBoot大大简化了配置的过程。
编写SpringBoot启动类
1
2
3
4
5
6
7
8
9
10
11
12
13
14
15
16
| package com.hrp;
import org.springframework.boot.SpringApplication;
import org.springframework.boot.autoconfigure.SpringBootApplication;
@SpringBootApplication
public class MyApplication {
public static void main(String[] args) {
SpringApplication.run(MyApplication.class);
}
}
|
编写实体类
1
2
3
4
5
6
7
8
9
10
11
12
13
14
15
16
17
18
19
20
21
22
23
24
25
26
27
28
29
30
31
| package com.hrp.domain;
import lombok.Data;
import tk.mybatis.mapper.annotation.KeySql;
import javax.persistence.Id;
import javax.persistence.Table;
import java.util.Date;
@Data
@Table(name = "user")
public class User {
@Id
@KeySql(useGeneratedKeys = true)
private Long id;
private String username;
private String password;
private String name;
private Integer gender;
private Date birthday;
private String phone;
private String picture;
private String address1;
private String address2;
private String address3;
private Integer power;
}
|
附上数据库建表语句(MySQL数据库)
1
2
3
4
5
6
7
8
9
10
11
12
13
14
15
| CREATE TABLE `user` (
`id` bigint(10) NOT NULL AUTO_INCREMENT,
`username` varchar(20) DEFAULT NULL,
`password` varchar(20) DEFAULT NULL,
`name` varchar(20) DEFAULT NULL,
`gender` int(1) DEFAULT NULL,
`birthday` date DEFAULT NULL,
`phone` varchar(20) DEFAULT NULL,
`picture` varchar(50) DEFAULT NULL,
`address1` varchar(50) DEFAULT NULL,
`address2` varchar(50) DEFAULT NULL,
`address3` varchar(50) DEFAULT NULL,
`power` int(1) DEFAULT NULL,
PRIMARY KEY (`id`)
) ENGINE=InnoDB AUTO_INCREMENT=15 DEFAULT CHARSET=utf8;
|
编写Common类
1
2
3
4
5
6
7
8
9
10
11
12
13
14
15
| package com.hrp.common;
import tk.mybatis.mapper.additional.idlist.IdListMapper;
import tk.mybatis.mapper.additional.insert.InsertListMapper;
import tk.mybatis.mapper.annotation.RegisterMapper;
import tk.mybatis.mapper.common.Mapper;
@RegisterMapper
public interface BaseMapper<T,D> extends Mapper<T>, IdListMapper<T,D>, InsertListMapper<T> {
}
|
【注意】在这个类中,我们需要注意一些包的引入,比如Mapper这个接口是tk.mybatis.mapper.common包下的,不要导错了。
编写数据访问层
1
2
3
4
5
6
7
8
9
10
11
12
13
14
15
16
| package com.hrp.mapper;
import com.hrp.common.BaseMapper;
import com.hrp.domain.User;
import org.apache.ibatis.annotations.Mapper;
@Mapper
public interface UserMapper extends BaseMapper<User,Long> {
}
|
【注意】这里需要注意几个点,同样是导包问题
- @Mapper注解的包是ibatis的
- 这里的BaseMapper是我们自己写的那个,不是tk.mybatis(通用Mapper)的
编写业务层
业务层接口
1
2
3
4
5
6
7
8
9
10
11
12
13
14
15
16
17
18
| package com.hrp.service;
import com.hrp.domain.User;
import java.util.List;
public interface UserService {
List<User> findAll();
}
|
业务层实现
1
2
3
4
5
6
7
8
9
10
11
12
13
14
15
16
17
18
19
20
21
22
23
24
25
| package com.hrp.service.impl;
import com.hrp.domain.User;
import com.hrp.mapper.UserMapper;
import com.hrp.service.UserService;
import org.springframework.beans.factory.annotation.Autowired;
import org.springframework.stereotype.Service;
import java.util.List;
@Service
public class UserServiceImpl implements UserService {
@Autowired
private UserMapper userMapper;
@Override
public List<User> findAll() {
return userMapper.selectAll();
}
}
|
【注意】没错,我们没有写任何的sql语句,只是在实体类上写了一些注解,持久层实现了一个Mapper接口,我们就可以直接使用一些简单的增删改查的方法,这就是通用Mapper的强大之处。
编写Web层
1
2
3
4
5
6
7
8
9
10
11
12
13
14
15
16
17
18
19
20
21
22
23
24
25
26
27
| package com.hrp.web;
import com.hrp.domain.User;
import com.hrp.service.UserService;
import org.springframework.beans.factory.annotation.Autowired;
import org.springframework.http.ResponseEntity;
import org.springframework.web.bind.annotation.RequestMapping;
import org.springframework.web.bind.annotation.RestController;
import java.util.List;
@RestController
@RequestMapping("user")
public class UserController {
@Autowired
private UserService userService;
@RequestMapping("list")
public ResponseEntity<List<User>> findAll(){
return ResponseEntity.ok(userService.findAll());
}
}
|
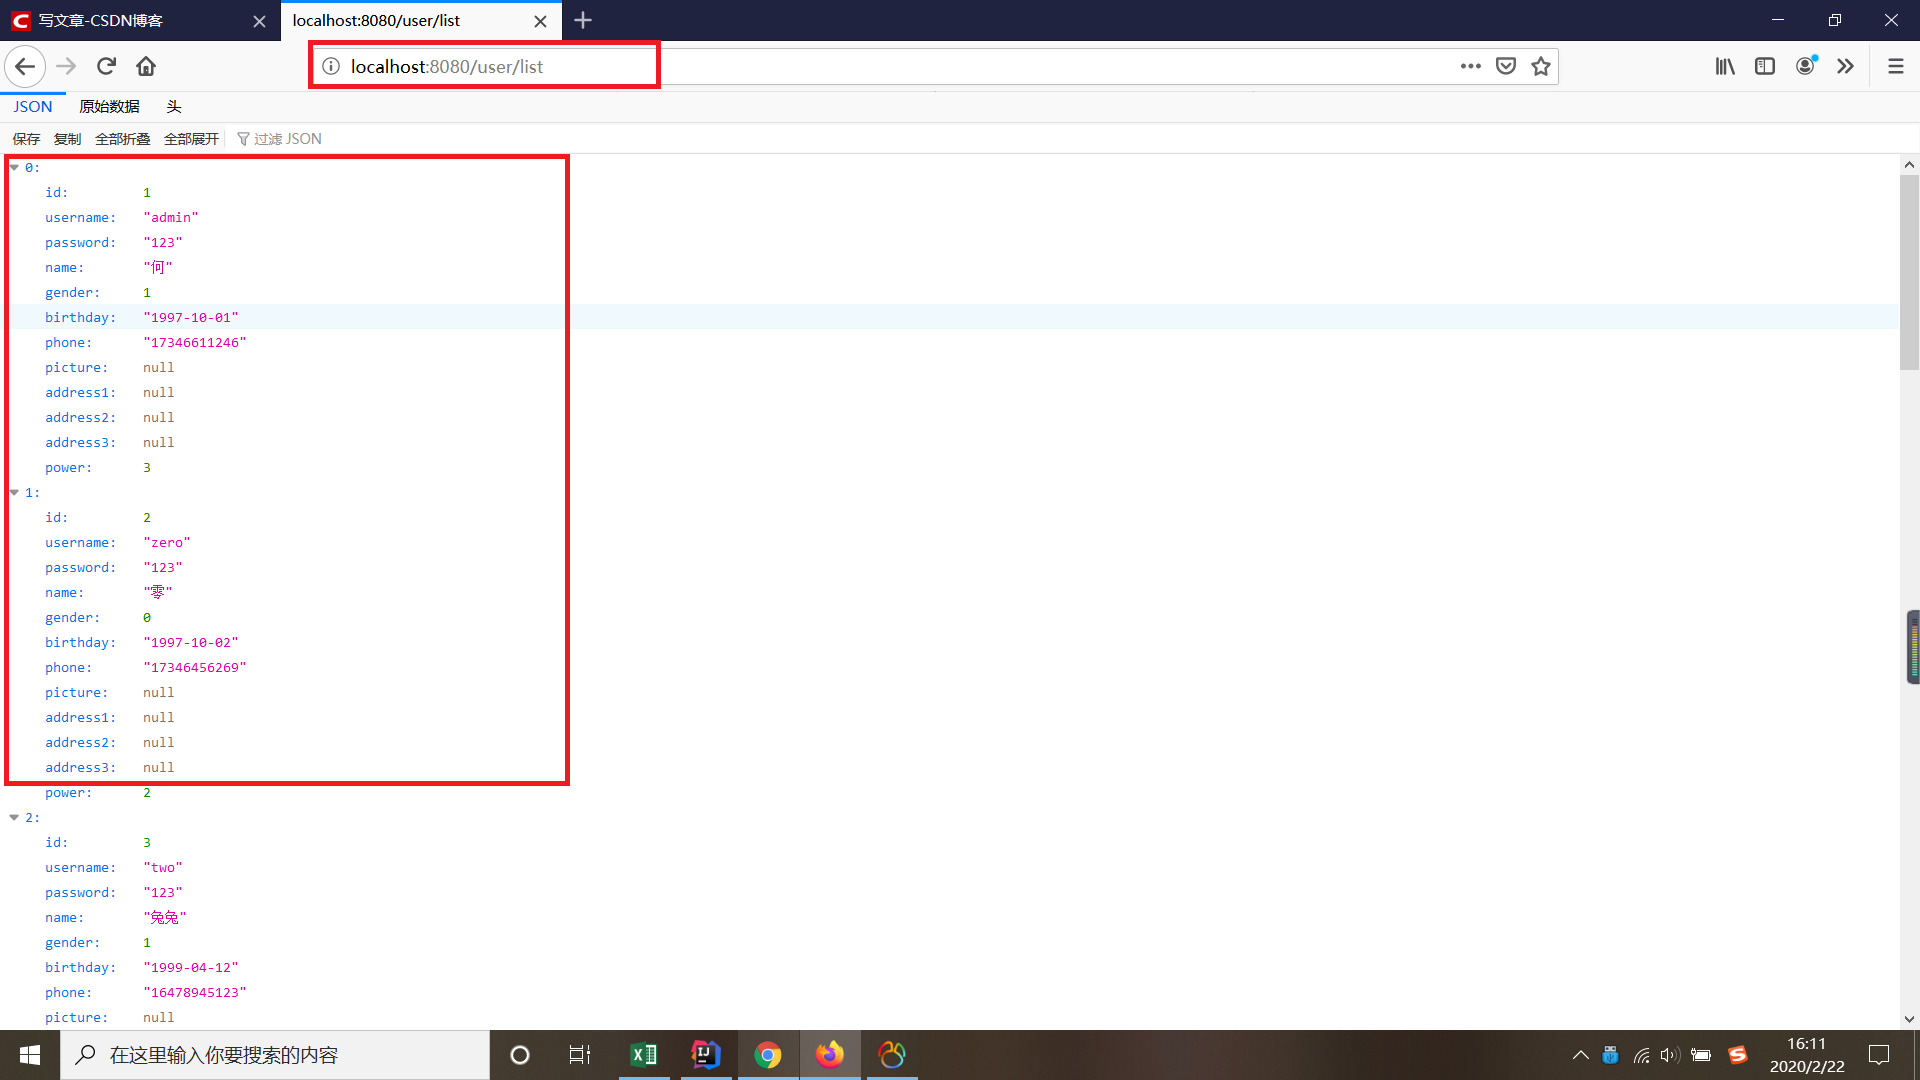
最后
我们运行启动类的main方法,启动这个SpringBoot项目,访问/user/list接口。


